That slow, persistent drip making a stain on your ceiling probably started long before you ever noticed it. In Dublin, the rhythmic sound of rain on a metal roof is usually just a part of life, but when that rhythm changes to a drip, it’s a signal you can’t ignore. A compromised roof doesn’t just let in water; it threatens the timber structure of your home and turns your valuable insulation into a soggy mess. You need to act quickly to stop corrosion in its tracks. This guide will help you figure out the source of the problem and decide whether it’s time to grab a ladder or call in the professionals at Emergency Roofers Dublin.
Important Notes
- The most common sources of leaks are surprisingly small: failing screws, separating seams, and worn-out flashing around chimneys.
- Dublin’s unique climate, with its heavy rainfall (over 700–800 mm a year) and salty sea air, creates a perfect storm for accelerating rust on metal panels.
- Water is sneaky and often travels along the roof’s support beams (purlins), which means the real source of a leak can be 1–3 metres away from the damp spot on your ceiling.
- Thinking of a DIY repair? You’ll need a bone-dry roof, a day with temperatures above 5 °C, and sealants made specifically for metal.
- A little regular maintenance, like checking and tightening screws, can add another 10–20 years to your roof’s life.
- For widespread rust, panel replacement, or tricky flashing problems, it’s time to call in a professional.
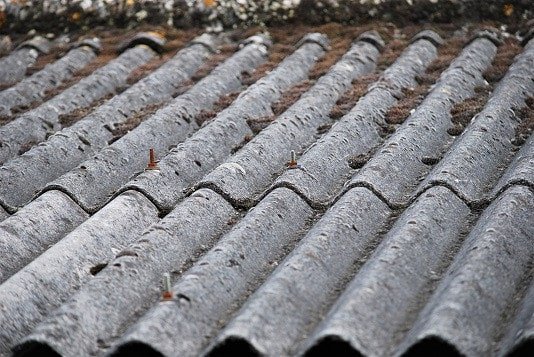
Why Your Corrugated Metal Roof Is Leaking
Metal roofs are tough, but they aren’t bulletproof. The most common points of failure are the fasteners, the seams where panels overlap, and the flashing that seals off areas around chimneys or vents. Think of your roof constantly expanding and shrinking with the changing temperatures. Over time, this movement can cause screws to work their way out and sealants to dry up and crack. Here in Dublin, the challenge is doubled. We have a high annual rainfall, often over 700–800 mm, mixed with salt-heavy air blowing in from the coast. This combination creates an aggressive environment that wages a constant war on any unprotected metal.
Ignoring these early warning signs can lead to some serious financial pain down the road. For a typical semi-detached house in Dublin with a corrugated extension of 15–30 m², a tiny drip can escalate into a full-blown structural crisis. The cost of repairing rotted timber beams and replacing interior plaster can easily run between €1,500 and €5,000+. While a well-maintained metal roof should protect you for 40–70 years, letting leaks go unaddressed can slash that lifespan by 30–50%.
How to Pinpoint the Exact Source of the Leak
Finding where the water is getting in is rarely a simple task. Water is sneaky; it follows the path of least resistance. It will often run along the roof’s support beams (purlins) or down the channels of the corrugations before it finally drips onto your insulation or ceiling. That damp patch in your bedroom could easily be 1–3 metres away from the actual hole in the roof.
You can play detective by paying attention to the weather. If the leak only shows up during a driving rain that comes from a specific direction, the problem is likely with the seams or flashing on that side of the house. On the other hand, if a leak appears after hours of steady, straight-down rain, it usually points to tiny failures in the screws or fasteners. Professionals use tools like controlled hose tests and moisture meters to find the exact entry point. This kind of precision allows Emergency Roofers Dublin to trace hidden water paths, which can reduce the size of the repair area by 20–40%, saving you money.
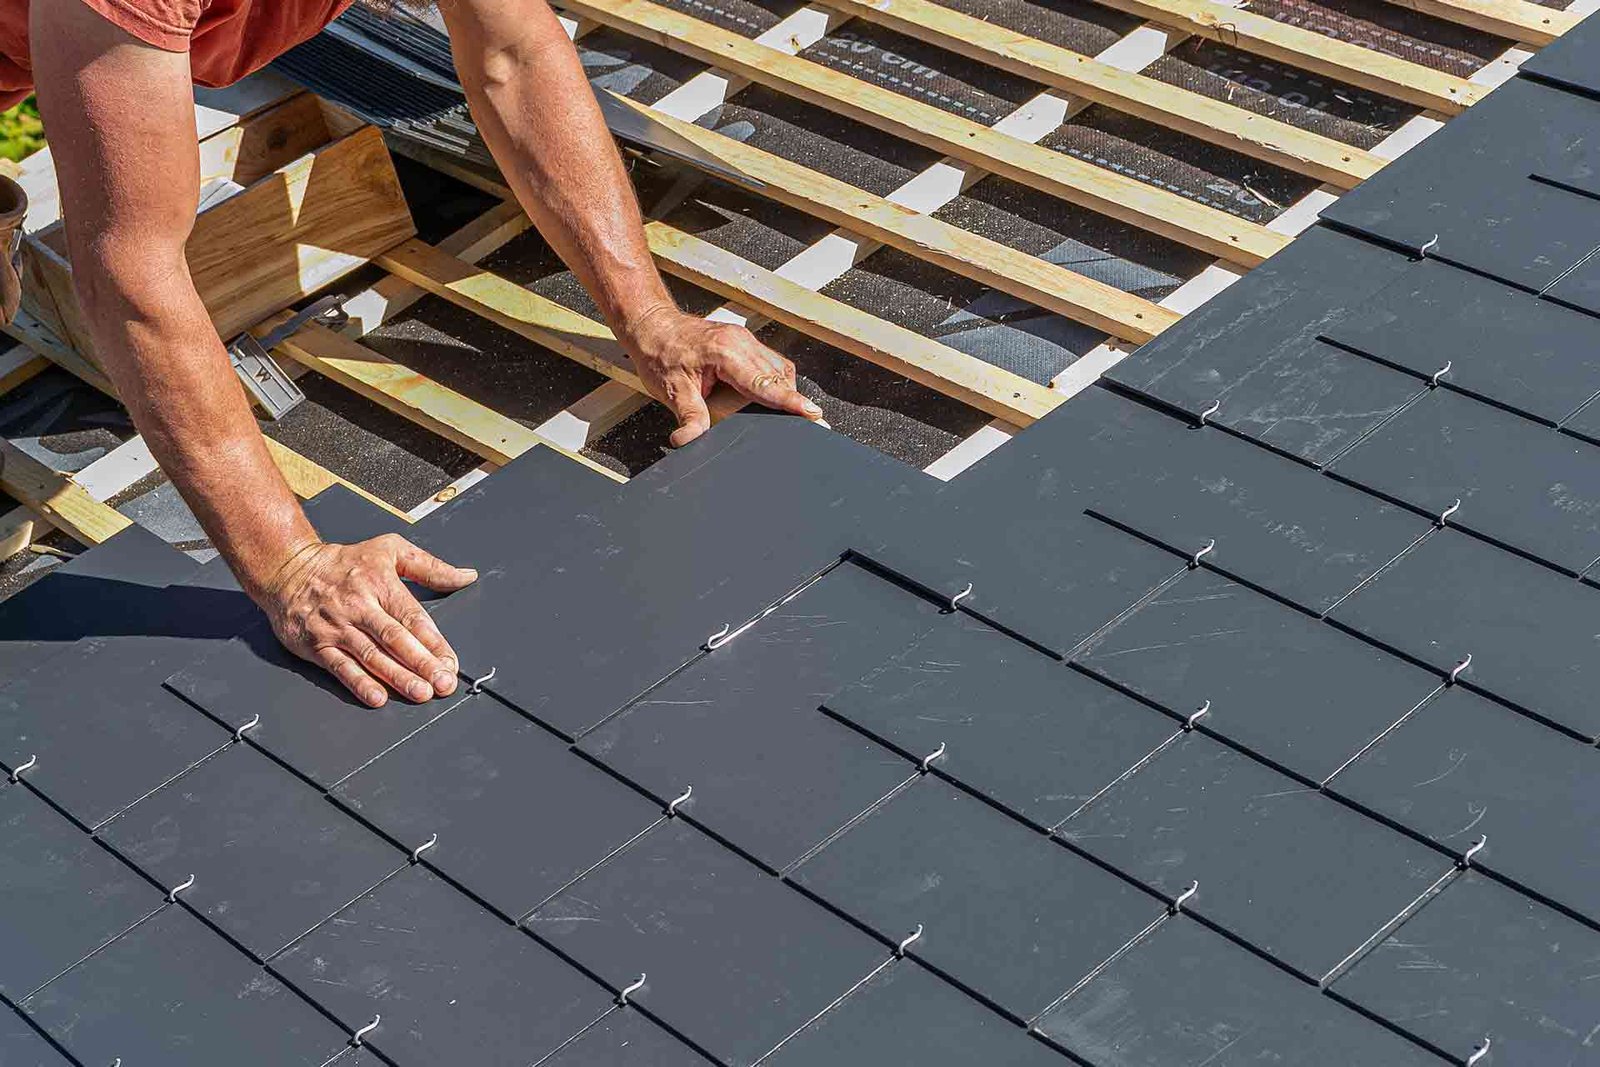
Preparing for Your Corrugated Roof Repair
Never underestimate how dangerous working on a metal roof can be. When these surfaces are wet, they are as slick as a sheet of ice. You must use proper safety equipment, including fall-arrest gear and roof ladders. And please, never work alone. Before you even think about applying a sealant or patch, the roof needs to be completely dry. Most repair products also need a minimum temperature of 5–10 °C to cure properly and form a lasting bond.
The time you spend on preparation is what separates a quick fix that fails in a month from a solid repair that lasts for a decade. Start by clearing all the leaves and debris from your gutters and the roof surface. Give the repair area a good wash with mild detergent and water. Once it’s dry, use a wire brush to remove any loose rust or flaking paint. It’s also crucial to scrape away any old, cracked sealant. New products simply won’t stick to dirty or silicone-covered surfaces.
How to Tighten or Replace Leaking Fasteners
That humble little screw is the number one culprit in most metal roof leaks. Each fastener is fitted with a rubber washer that’s supposed to create a watertight seal. But over the years, sunlight breaks down the rubber, or the screw simply loosens from the roof’s constant expansion and contraction. It’s a good idea to inspect these fasteners every year or two.
Look for washers that have cracked or have been squeezed out from under the screw head. Gently tighten any loose screws until the washer compresses just a little. Be careful not to over-tighten, as that will split the rubber and make the problem worse. If a screw is rusty or just spins without tightening, the wood underneath might be soft or rotted. You’ll need to replace it with a slightly wider screw fitted with a fresh neoprene washer. For extra protection, add a small dab of sealant over the screw head. If you discover that hundreds of screws are loose on an older roof, having Emergency Roofers Dublin perform a full re-fastening is often a smarter and more cost-effective choice than chasing individual drips forever.
How to Seal Small Holes, Pinholes, and Hairline Cracks
For those tiny, annoying defects, you can take a more targeted approach. You’ll need a high-quality roof cement or a silicone/polyurethane sealant that is specifically designed for metal. Whatever you do, don’t grab that tube of generic bathroom silicone; it will shrink and peel off in the harsh Irish weather, leaving you right back where you started.
Clean the area with meticulous care. Your repair patch should extend at least 25–50 mm beyond the visible hole on all sides to ensure a strong, watertight bond. Give the surface a light sanding to help the sealant get a better grip. Apply the product generously, then use a putty knife to smooth it out, making sure water can’t pool up against the edge of the patch. A carefully done repair like this can keep the water out for another 5–10 years.
How to Patch Larger Holes and Rusted Panels
When you’re dealing with significant rust or a hole larger than a two-euro coin, a simple dab of sealant just won’t cut it. You can’t just caulk over a structural weakness. For this job, you’ll need a physical patch made from a piece of sheet metal that matches the profile of your corrugated roof.
Cut a patch that’s big enough to overlap the solid, undamaged metal by at least 50 mm on all sides. Apply a thick layer of roofing adhesive or butyl tape to the entire underside of the patch. Press it down firmly over the damaged area. Secure the patch with pan-head metal screws every few centimetres around the perimeter. As a final step, seal the edges of the patch and all the new screw heads with your metal roof sealant. If a whole panel is severely rusted or warped, don’t try to patch it. The only real solution is to replace the entire sheet to restore your roof’s integrity. A project like this, involving around 14 m² of repairs, rust treatment, and panel work, can take about two weeks to complete correctly.
How to Seal Leaky Seams, Joints, and Overlaps
Water has a pesky habit of using capillary action to creep uphill into the tiny gaps where your metal panels overlap. This makes seams a frequent point of failure. Start by cleaning the joint with a wire brush to get rid of any moss, dirt, or oxidation. Apply a continuous, generous bead of elastomeric or polyurethane sealant right along the seam. Use a tool to smooth it out so that water is encouraged to run off instead of sitting on top. For a truly permanent solution, a professional roof coating can be applied to bridge all these gaps, effectively creating one seamless, waterproof membrane across the entire structure.
How to Repair Flashing Around Chimneys and Vents
That spot where your metal roof meets the solid brick of your chimney is a classic trouble spot for leaks. The two different materials expand and contract at different rates, which can tear apart rigid seals over time. Leaks here are often mistaken for problems with the roof itself when the flashing is actually the culprit.
First, remove all the old tar and mastic. Those black, gooey fixes are temporary at best and often make the real problem harder to fix later. Clean both the metal and the masonry right down to the bare material. You can then install new flashing or re-seal the existing metal with a compatible urethane sealant. Make sure the top edge of the flashing is tucked securely into a groove in the brickwork or is protected by counter-flashing. Emergency Roofers Dublin can handle both the roofing and the masonry aspects of this job, ensuring the transition is perfectly watertight.
Applying Protective Coatings for Ultimate Waterproofing
Why just patch leaks when you can prevent them from happening in the first place? Applying a protective elastomeric or silicone roof coating is like giving your roof a seamless, flexible, waterproof jacket. This liquid-applied membrane seals up all the micro-cracks, pinholes, and vulnerable seams that you might not even be able to see with the naked eye.
When applied to a clean, well-prepared surface, these coatings can extend the service life of your roof by an extra 10–20 years. The thickness of the coating is key. A proper application usually requires a 20-litre drum to cover 40–60 m² in two coats. This isn’t just a layer of paint; it’s a tough, functional waterproofing barrier.
Your Essential Seasonal Maintenance Checklist
A leak-free roof is the result of a little routine care. Plan to inspect your roof twice a year, ideally in the spring and autumn. The single most important task you can do is clean your gutters. When gutters get blocked, water backs up and can flow underneath your roof panels, completely bypassing all your weatherproofing. Clean them thoroughly at least twice a year.
It’s also a good idea to wash the roof surface annually. This helps remove the salt deposits and organic debris that can slowly eat away at the roof’s protective coating. A professional inspection, which might cost between €150–€300, is a small investment that can spot loose flashings and deteriorating washers before they lead to thousands of euros in interior damage.
When to Call Emergency Roofers Dublin for Professional Help
Let’s be honest, some jobs are just not meant for DIY. If your roof is two storeys or higher, the risk of a serious fall simply outweighs any potential savings. Widespread rust that points to structural failure, or complex leaks around chimneys and vents, require professional tools and years of expertise. If you’ve tried to patch a leak yourself and the water is still finding its way in, it’s time to stop and call for help.
At Emergency Roofers Dublin, we specialize in corrugated metal roof systems. We provide detailed inspections with photographic reports and give you a fixed-price quotation in euros, so there are no surprises. We make sure all our work complies with insurance standards and back it up with a solid warranty. Let us protect your home, so you can go back to ignoring the sound of the rain.
Commonly Asked Questions
The main culprits are usually failing fasteners and worn-out sealants. Over time, the rubber washers on roofing screws get brittle from sun exposure and temperature changes, which creates small gaps where water can seep in.
Ireland’s constant freeze-thaw cycles and heavy rain cause the metal to expand and contract, which can loosen screws and crack the sealant at the seams.
Checking your screws and resealing the overlaps between panels every few years can prevent most of these issues.
The cost really depends on the size and complexity of the problem.
For simple jobs like resealing a seam or replacing a few fasteners, you can expect to pay between €150 and €400, depending on how easy it is to access the roof.
For more extensive work like patching large areas, repairing flashing, or replacing a panel, the cost can range from €1,500 to over €5,000.
Investing in a professional inspection is a smart move, as it often catches small issues before they become expensive structural problems.
Absolutely not, and here’s why you should never use a standard acid-cure silicone.
Many common household silicones release acetic acid as they cure, which is a chemical that actively corrodes metal and will cause rust.
Standard silicone isn't flexible enough to move with the metal as it expands and contracts with the temperature, which means the seal will quickly fail.
Always use a neutral-cure silicone or a polyurethane sealant that is specifically labelled as safe for metal roofing.
Leaks that only show up during a downpour usually point to a problem with water flow or flashing. In a heavy rain, water can back up in gutters or valleys and get forced up and under the roof panels, especially if the panel overlap isn't sufficient.
You can simulate a heavy rain with a garden hose. Start low on the roof and slowly work your way up to isolate exactly where the water is getting in.
First, make sure your gutters are completely clear. You might also consider installing foam closure strips at the eaves to block wind-driven rain from getting underneath.
Walking on a metal roof is extremely risky and should be done with great caution. Metal roofs are incredibly slippery, particularly when they are wet or have a bit of moss or algae on them.
You must only step where the roof is supported by the underlying purlins (the lines of screws are a good guide to their location) to avoid denting the panels or falling through a rusted section.
If you must go on the roof, always use a safety harness and proper roof ladders. If you have any doubt at all, hire a professional.
Polyurethane or chemically compatible silicone sealants are by far the best choice. Metal roofs expand and contract a lot, so you need a sealant that can stretch and move with it without cracking.
Polyurethane sealants provide excellent UV resistance and stick to metal far better than older, asphalt-based mastics. Look for products that are specifically marked for metal roofing to ensure they won't cause corrosion.